
Quick Navigation
Introduction
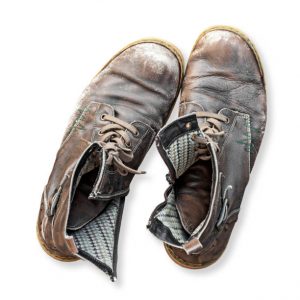
Do you have your “all-time-favorite shoes” packed somewhere in the house? You cannot bring yourself to discard them in one of those trashy cans because seeing them lying in those cans hurt you. Perhaps your solution is to replace them with exactly new shoes of the same kind all around. Hold that idea a sec!
As it ever becomes obvious to you to do some sort of “revival” for your old shoes? Yea… that’s right. Old shoes can be effortlessly revived and restored to their once upon a time original look with straightforward DIY approaches that can spare you the expense of purchasing new shoes altogether. If you truly want to get the hang of reviving your “faves,” you need to read this guide carefully. Shall we begin…
How to Revive your Old Shoes
Your shoes might not be in their proper shape because years have grown on them. Normal cleaning of your shoes is just the first step towards reviving them. Cleaning can show you where there is damage, and hence, a repair can be done accordingly. Here is how you can clean your shoes:
Get a brush with delicate fibers to eliminate all hints of surface soil, residue, mud, and other garbage
Wash your shoes will a saturating saddle cleanser to eliminate overabundance of wax from past shines.
Permit your shoes to dry by stuffing them with newspaper. Direct daylight and radiator are not recommended.
How to Re-sole your Old Shoes
One of the primary and the principal issues with old shoes is that the sole wears off and can even fall off from the body if it is a boot. The stitches turn out to be weaker, and a few soles get openings in it. For each issue to be resolved, you need to either re-sole the whole sole or some part. Below is how to go about re-soling your shoes:
Get the sole cleaned using a toothbrush that is no longer used to get off all the collected earth in it.
Utilize sandpaper and scour with it to get a smooth completion of the sole.
Using a kitchen wipe, apply glue anywhere on the sole if you think you should supplant the whole one or apply it to some parts where you need to connect a bit of the new sole.
Allow the glue to remain on the sole for around 5 minutes to make the glue turns somewhat thick inconsistently.
Repeat the above strides with the bit of a new sole that you will connect.
One the glue has gotten shabby, press the new sole on the shoes
Use a flexible band to make sure the new sole is firmed to the shoes. Allow the new sole to remain fixed on the shoe for some time
Utilize a little sled and minuscule nails to secure the sole forever onto the boots.
How to Polish your Old Shoes like the Professionals?
Do you know that there is a difference between the way you polish at home and when the professional do it for you? If you can get the hang of this DIY approach, your old shoes will in no time stand out from the crowd of shoes. To begin with, get yourself a good quality polish, moisture and soft fabric, then start with these steps:
Wrap a piece of the cloth over your index finger and plunge it in the polish
Move the finger in little round movements on the leather. The expert tip is to cover just a little bit of the surface leather at a time
If you feel the territory has gotten somewhat harsh, add some water to the fabric by dunking it in the bowl of water.
Continue adding water and keep on developing layers of polish until you accomplish that high sparkle
Need to Dye Your Old Shoes?
On the off chance that your shoes are seriously scraped and cleaning, polishing wouldn’t sufficiently be, and you can utilize color dyes to reestablish them to their previous wonder.
It is essential to ensure that your shoes are totally liberated from polish, cleanser, wax, or oil before you start. Otherwise, the shoe’s leather won’t appropriately consume the dye. A specialist stripper product can take care of the work.
Then, pick your shading. Recall that in case you are coloring shoes, embrace the dark sides of colors! Earthy colored or burgundy to dark is fine. However, it is harder to color dark shoes with a lighter tone. Here is how to dye your shoes:
As mentioned earlier, pick your shoe color with care. Reading reviews from a past client can help you
Utilize a little, fine brush to apply the dye in small portions of the shoe
It would be best to work in a circular motion and a small patch of the area.
Please do this for the other parts of the shoe until it is covered with dye
Permit the shoe to dry. At least leaving the shoe for a day would do
You can re-apply little regions or apply another layer of dye if the previous application is not even.
Polish the shoe to enhance the shine and sparkle by following the steps above
Some DIY Tricks to Revive your Shoes (Boots, Sneakers, Trainers…)
Here are some tricks to help restore your old shoes to their previous wonder
When your shoes have been stained with grease
Utilize cornstarch or baking soda and apply it everywhere on the lubed surface
Rub the leather delicately with a wet bit of cotton cloth
Allow it to sit for the time being (at least 24 hours)
There will be the absorption of all oil or grease
Use a damp cloth to wipe the surface and dry thoroughly
When your shoes have been stained with ink
Get a nail polish remover. Liquor would do too
Apply one of them on the ink spot. Try not to rub it now as the ink would spread to the other parts
Once the liquor has been at least absorbed, take a bit of dry cloth and rub dry the stain
Utilize a cleanser and cloth to rub on the spot tenderly
Dry the shoes thoroughly
Conclusion
Since you have realized how to reestablish those old shoes to their former glory, the next thing for you to do is to execute everything examined in this guide since everything you can do at home and a few items to utilize are moderately cheap. Doing this will spare you the costs of buying new footwear. Along these lines, feel free to give them a shot and resurrect those shoes. Ciao for now